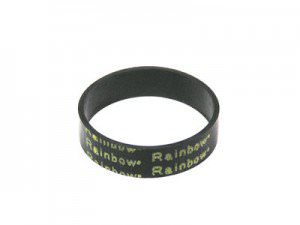
How To Replace A Rainbow Vacuum Belt
At some point, nearly every vacuum cleaner needs to have a little work done on it. Often, it is simple parts, like a new filter, a different hose, or even the belt.
Many of these parts are easy to change at home with a few basic tools and an hour or so of time. To get started with this, vacuum owners should obtain the replacement part and clear space to take the unit apart in.
Access The Belt
After clearing space to work in, the first step is to make sure that the unit is turned off and unplugged. Once it has been unplugged, the next step is to remove the floor brush from the unit.
The floor brush, such as the Power Nozzle, often has a small belt on the underside that helps to spin the brush so that it can pick up debris. It is typically behind a panel that is held on with a few screws or a locking tab.
The panel should be removed and set aside so that it does not get lost. It may also be a good idea to check the panel and any other parts to make sure that they are in good shape.
Replace Belts With The Right Part
Before replacing any belt it is important to make sure that it is the right size and style. The easiest way to make sure of this is to check the schematics or the owner’s manual to get the part number.
After finding the part number, the next step is ordering a replacement online or by phone from an authorized seller. This is important as off brand belts or ones for another series may not fit or work properly.
 Once the right part has been obtained, the next step is to remove the existing part from the unit and attach the new one by gently stretching it until it is place. Care should always be taken to avoid over stretching it as this can lead to needing a new one sooner.
After putting the part on, owners should check it to make sure that it is secure on the unit so that it does not slip off when the unit is on. It should also be checked to make sure there are no tears or frayed edges that can sometimes occur with improper handling.
The best way to test that it has been attached properly and is in good shape is to manually rotate it a few times. Never turn the unit on while working on it to test it as this may result in an accident or damage.
Put It All Back Together
The final step to replacing belts in a vacuum cleaner is to put everything back together. This process is fairly simple as most of the panels just snap back on, or require only a few screws.
After putting the panel back on, the part should be tested again to make sure that the brush moves freely and smoothly. Again, this should be done manually, while the unit is turned off and unplugged.
Once this has been completed, the Rainbow vacuum belt is ready to be used. Owners can then resume vacuuming like normal, but should check it at least once afterward to make sure that it stays in place.